/
Using Custom Submit Action With the S4S Sitecore Form Mapping Wizard
Using Custom Submit Action With the S4S Sitecore Form Mapping Wizard
- Ashan Wijayawardhane (Deactivated)
- Paul Carter (Deactivated)
- FuseIT OA
Owned by Ashan Wijayawardhane (Deactivated)
![]() IMPORTANT: Creating your own Submit Action will require custom development.
IMPORTANT: Creating your own Submit Action will require custom development.
It is possible to configure a custom Submit Action to work with the S4S Experience Form Mapping Wizard by implementing the following steps:
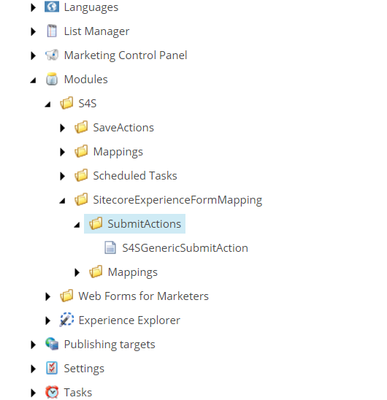
- Navigate to the /sitecore/system/Modules/S4S/SitecoreExperienceFormMapping/SubmitActions item where you will see the default S4S Save Action configuration:
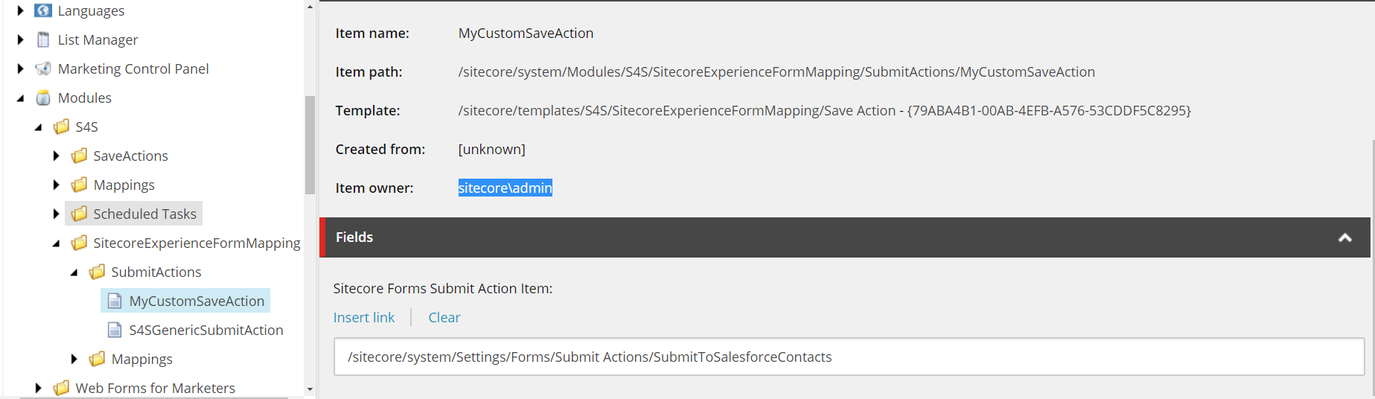
- Add a new child item to the /sitecore/system/Modules/S4S/SitecoreExperienceFormMapping/SubmitActions item that uses the /sitecore/templates/S4S/SitecoreExperienceFormMapping/Save Action template:
- Set the "Sitecore Forms Submit Action Item" field to the custom Submit Action that you have set in the Sitecore Experience forms submit actions:
- After assigning the custom Submit Action to a Sitecore Experience form, the form will now appear in the S4S Sitecore Experience Form Mapping Wizard
Custom Development
To make the S4S Mapping Wizard work with your Custom Submit Action, you will need to programmatically replicate the features contained in the S4S Generic Submit Action.
Next Step
Custom submit action code sample - Without Sitecore Analytics
Steps
- Using Custom Submit Action With the S4S Sitecore Form Mapping Wizard
- Custom submit action code sample - Without Sitecore Analytics
- Custom submit action code sample - With Sitecore Analytics
, multiple selections available,
Related content
Custom Submit Action
Custom Submit Action
More like this
Adding Connection String
Adding Connection String
Read with this
Using a Custom Save Action with the S4S Mapping Wizard (Pre-Sitecore 9)
Using a Custom Save Action with the S4S Mapping Wizard (Pre-Sitecore 9)
More like this
S4S Form Mapping Wizard and multiple languages
S4S Form Mapping Wizard and multiple languages
Read with this
Custom submit action code sample - Without Sitecore Analytics
Custom submit action code sample - Without Sitecore Analytics
More like this
Using a Custom Save Action with the S4S Mapping Wizard
Using a Custom Save Action with the S4S Mapping Wizard
More like this