S4S EXM Installation
- FuseIT OA
- Paul Carter (Deactivated)
- Ashan Wijayawardhane (Deactivated)
Note: S4S EXM is an upgrade from S4SLBPlus. The original naming may appear in the packages, development files, and namespaces. |
Sitecore Package
- Install the S4SEXM Sitecore package from Sitecore Desktop » Development Tools » Installation Wizard
- You can change the value of “interval” in the "S4SLBPlusScheduler" <agent> and control the S4SEXM scheduler run time (by default it has been set to eight hours).
In the App_Config/Sitecore/EmailExperience/Sitecore.EmailExperience.ContentManagement.config and App_Config/Sitecore/EmailExperience/Sitecore.EmailExperience.ContentDelivery.config, set all the “addCampaignToInteraction” parameters to true as shown below.
<param desc="addCampaignToInteraction">true</param>
Salesforce Managed Package
Note: The package for the Enterprise / Unlimited Edition contains APEX classes and Triggers that cannot be installed on Salesforce Professional Edition. |
- Install the Salesforce package from - https://login.salesforce.com/packaging/installPackage.apexp?p0=04t6F0000045ZuV
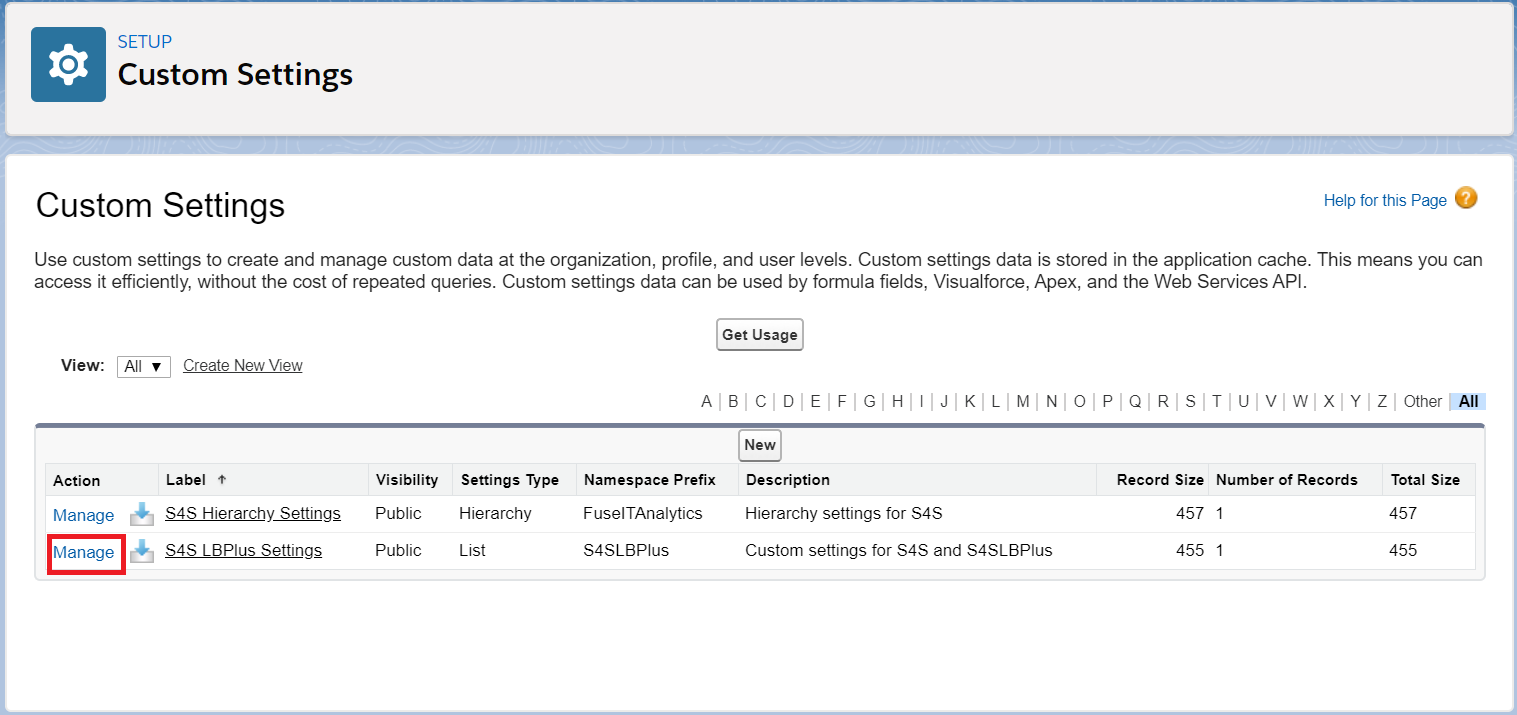
- Navigate to Setup » Build » Develop » Custom Settings (Salesforce Classic) or Setup » Platform Tools » Custom Code » Custom Settings (Lightning).
- Click Manage in front of S4S LBPlus Settings
- Click New to create a new setting.
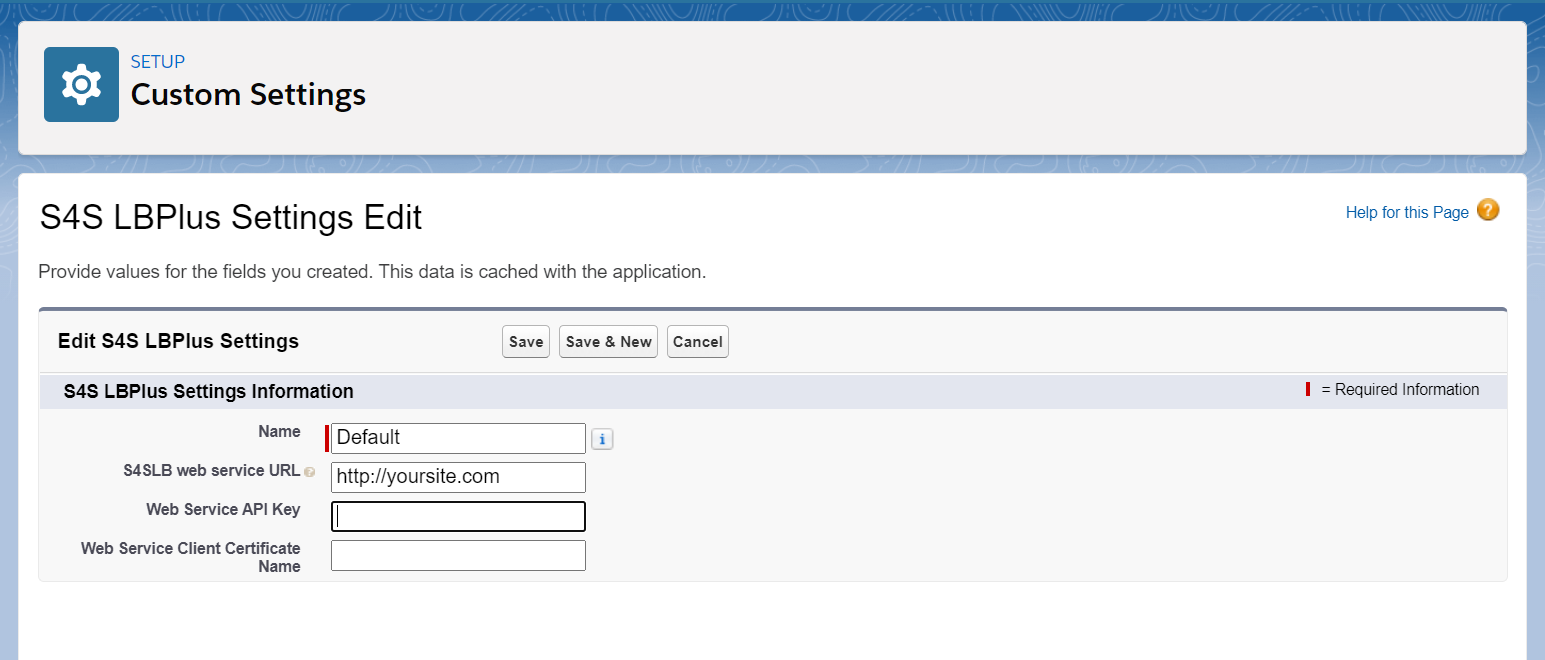
Set the Name to Default.
Set the S4SLB Web Service URL to the publicly accessible URL of your website (for example http://sitecoretest.fuseit.com) or an IP address which points to your website.
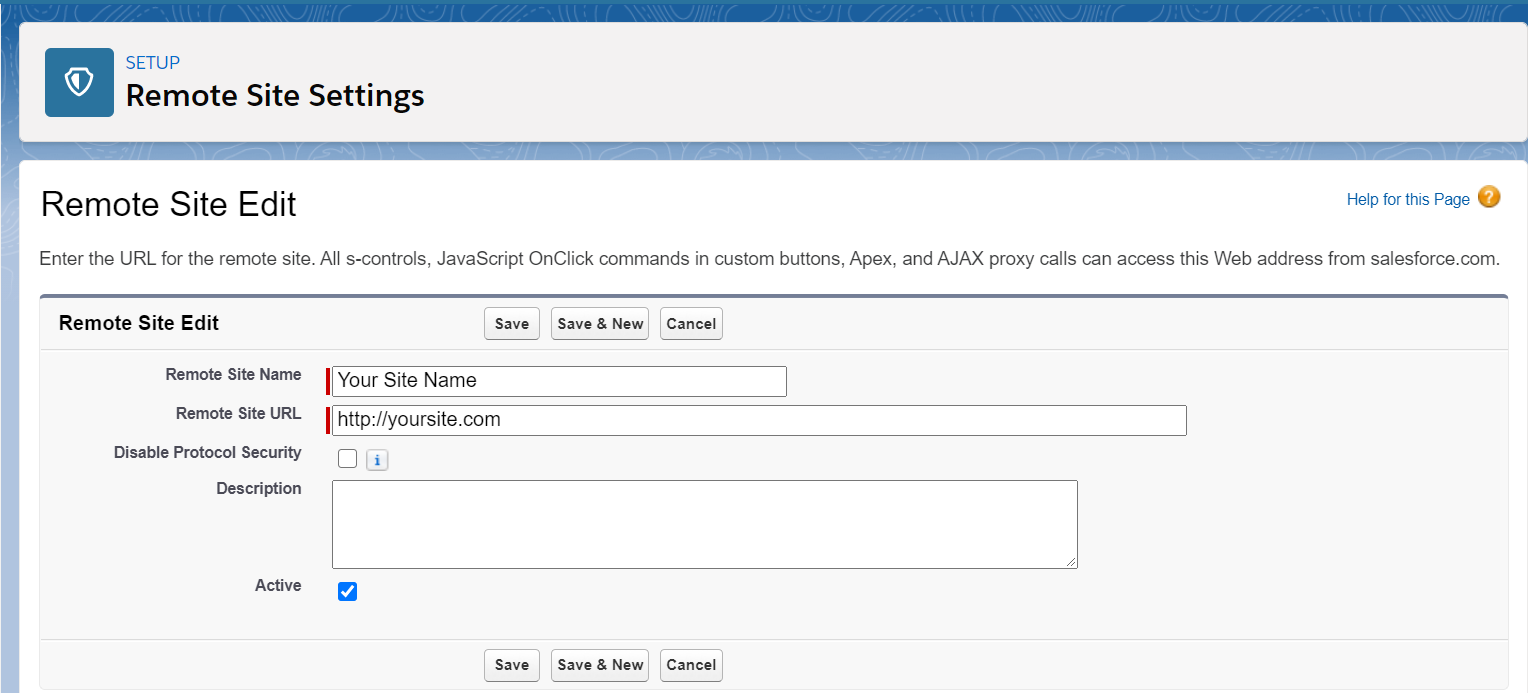
- Authorise the URL by adding it to Remote Site Settings. If your site address already exists in the remote site setting list, you do not need to do this again.
- Navigate to Setup » Security Controls » Remote Site Settings
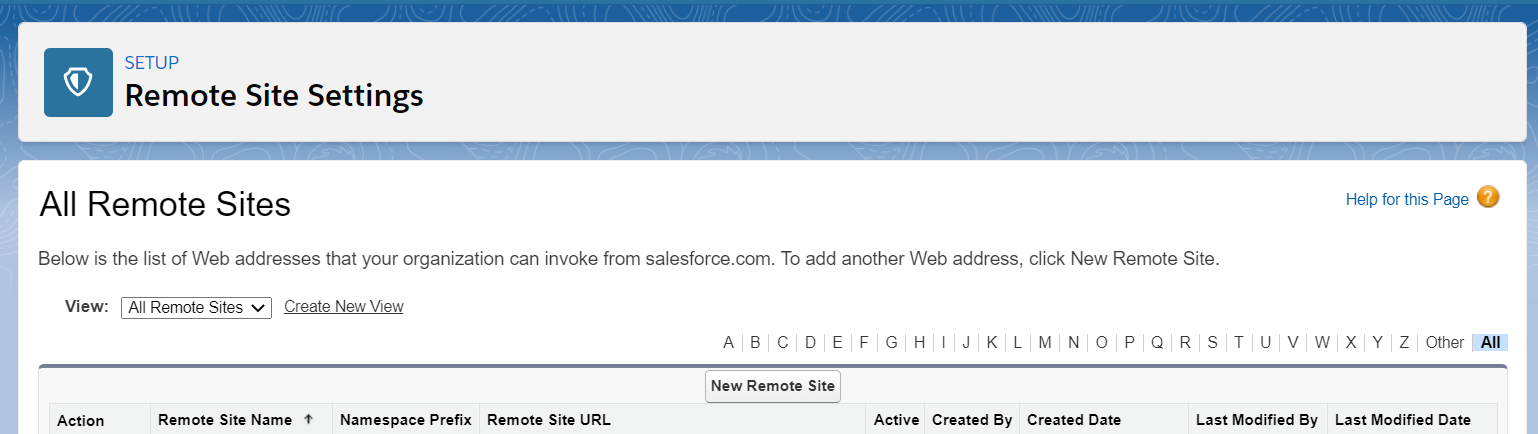
- Enter the URL or IP address set up in Custom Settings above.
Note: This is a common area for mistake, either the address is not set up in both places, it does not match, or it is not accessible from Salesforce. |
- Add the Sitecore Email Campaign Messages related list and the Get Sitecore Email Campaign Analytics button to the layout of Salesforce contacts and leads (as required).

- Make sure the visibility of Salesforce contacts and leads is enabled and Edit and View permissions have been granted to Email Opt Out field